
How do I assemble the GPS display for the boat and the wind speed display?
- Philippe

- Apr 10
- 2 min read
Updated: May 5
Step 1 consists of preparing the M5Stack Core2 module.
There's practically nothing to do as it comes pre-assembled with its screen, battery, and microSD card reader. All that's left is to format the 32GB microSD card to FAT32 and insert it into the card reader .
Wi-Fi connection and time setting
In order for the module to synchronize to the exact time and allow retrieval of data recorded on the microSD card via Wi-Fi , without having to remove it, you must enter your Wi-Fi network information.
Download the file below, fill it in with the username (SSID) and password of your Wi-Fi access point , then copy it to the root of the microSD card .
Step 2 involves installing the software inside the M5Stack Core2 module.
To easily install it on the M5Stack Core2 module, you can use the M5Stack Burner utility which allows you to download and install the software very easily.
Step 1 — Download and open M5Burner
Download M5Burner for your system (Windows/macOS/Linux).
Unzip the archive and open the M5Burner application.
Tip: On macOS, if a security alert appears on first opening, go to System Settings → Security & Privacy and allow the opening.
Step 2 — Connect the Core2
Connect the Core2 to the computer using a USB-C cable between the computer and the Core2.
Step 3 — Load the Anemometer firmware into M5Burner
Select "CORE2 & TOUGH" from the left column
Find the Core2 / OpenSailingRC-display profile in the list, then click on it.
Select the latest available version from the list in the top right corner. At a minimum, version 1.0.2.
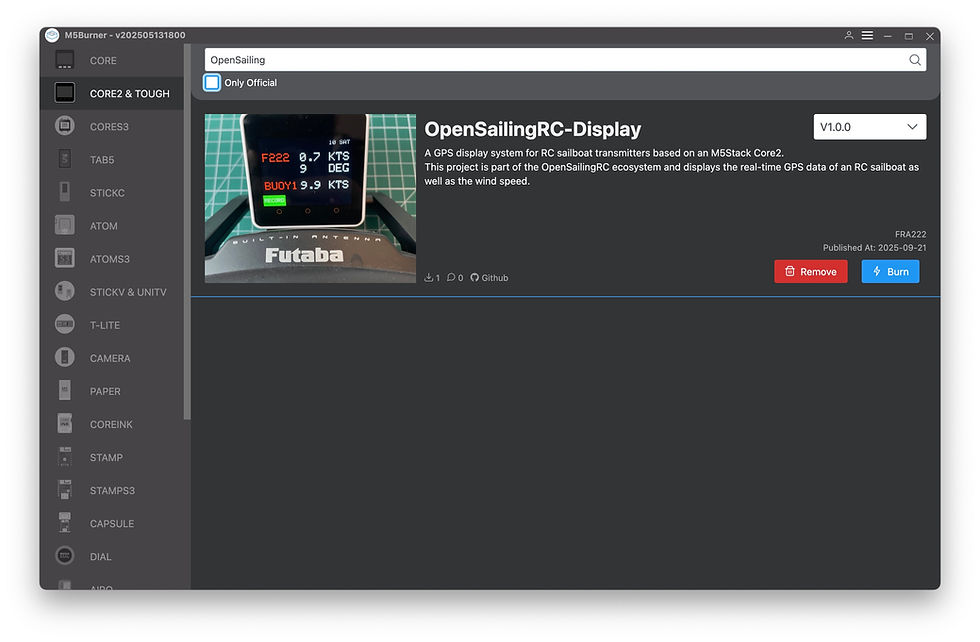
Step 4 — “Burn” Settings
Click on Burn (Engrave/Flash).
Port: verify that this is the Core2 port.
Speed: Leave the default value (e.g., 921600). If it fails, try 460800.
Erase: Check Erase Flash (delete) if you are reinstalling from scratch.
Start the engraving process. Wait for the success message.
Tip: If burning fails, see Troubleshooting. Changing the speed and using the Erase option often resolves the issue.
Step 5 — First Start-up
Once flashed, the Core2 restarts either automatically or after a power cycle:
The screen displays a home screen,
and it leaves traces on the serial port.
Troubleshooting (FAQ)
The port does not appear in M5Burner.
Try a different USB-C (data) cable , a different USB port , or a powered hub .
Install/authorize the USB drivers (CP210x or CH34x/CH9102). Restart the computer if necessary.
Burn fails / timeout / “Failed to connect”.
In M5Burner: check Erase , lower the speed (e.g. 460800), try again.
Unplug/replug the USB. On some computers, holding down the Atom S3 button while plugging it in forces flash mode.
macOS is blocking the application/driver.
Open System Settings → Security & Privacy and then Allow app/driver. Reconnect the cable.
The Serial Monitor is empty.
Check the correct port and the baud rate 115200 .
Close any other tools that might be using the port (Arduino IDE, PlatformIO, another Serial Monitor).

Comments